Create your own FLOOR. Step-by-step guide to setup and manage your event on FLOOR.
Most of us are having to make major adjustments to programs – cancelling in-person gatherings, scrambling to reschedule, or like, so many of us are going virtual.
Live Venue is a virtual real time page to host your online event. It’s a new way to imagine online events with all the essential solutions.
With event requirements changing, 10times offers a system that comes with over 100 modules to meet your needs. Our brand new FLOOR Video Conferencing Suite will help you host your virtual events a real boost.
FLOOR is a one-stop solution to manage, market, and monetize virtual events.
Schedule your first Virtual meeting
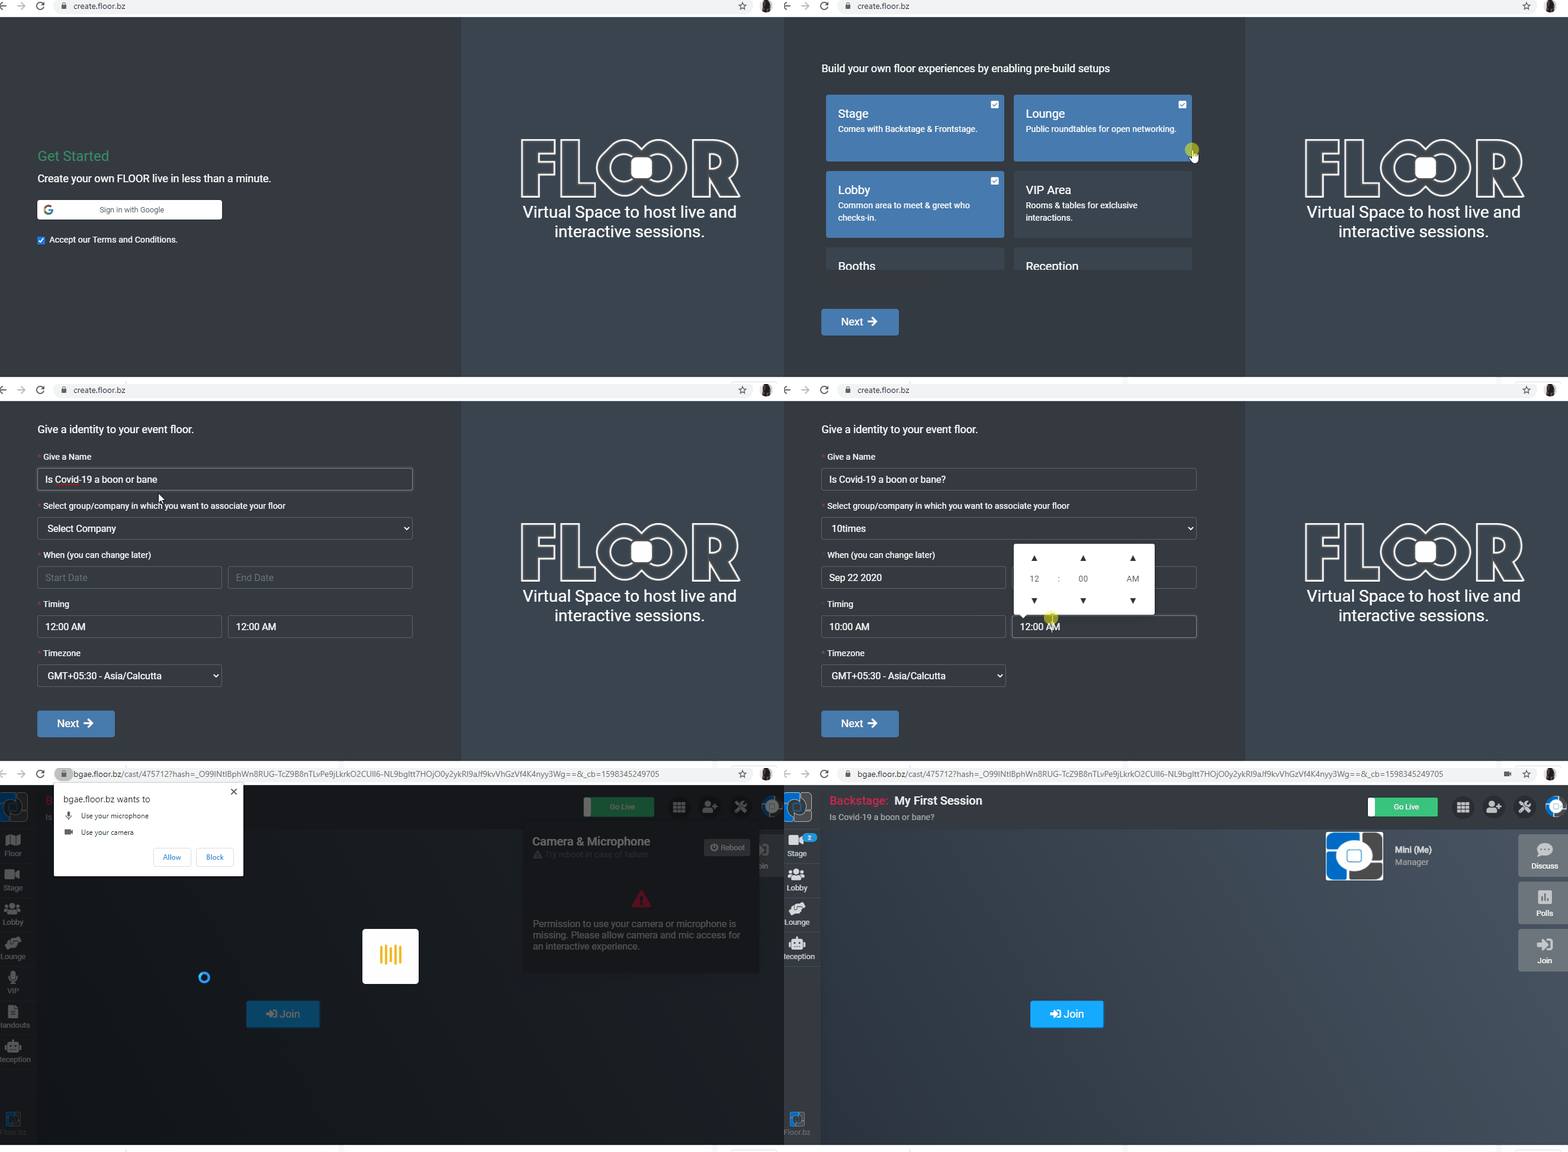
(Refer to the GIF file below for better understanding)
Step 1: Login to URL https://create.floor.bz/
Step 2: Click on the field "Sign in with Google" and enter your credentials.
Important Note:
If your organizing company is already registered on 10times and you have the login credentials as an admin/ event manager to access the dashboard, then preferably, use the same email id and exact same company name.
Step 3: Update your profile (Name, Designation and Company), if you are a new user.
You may select the company from drop down, if you are an existing user.
Step 4: Select the format For Events (For businesses is yet to be launched), enable the toggle, only if it is a private event and click on Next
Step 5: You may customize your Floor layout by selecting, only the features and pages you require. Scroll and select and click on Next.
Step 6: Fill in the basic details about your event and click on Next
Step 7: Click on the admin link (in blue) to land on your event Floor.

Note: You can also find the common joining link above, for your visitors. You can copy and share the same by clicking on the blue icon.
Step 8: You will land on your event Floor backstage now. You may go to the Host Dashboard, highlighted below, to add information about your event.
Step 9: You will see the option "Content" through which you will land on to the organizer dashboard. Complete the Event Overview page and click on Submit.
Step 10: Click on Floor > Room & Layout from the left menu and design your Floor layout.
Step 11: STAGE
You can add the number of sessions from here. there are two default sessions provided, so if there are total 4 sessions, Click on + 2 and then Create.
Step 12: Select and edit the sessions one by one as explained below.
Add Speakers, Host, Admin or Moderators (select from the drop down) from "+Add Speaker" and fill in the necessary details.
Add background image, welcome video and logo for your event.
Once all the fields are entered, click on Save & Publish.
The joining links for all the participants will be instantly created.
You can copy or share & invite them from here itself in just one click.
Note:
All admins would be visible under Reception/ VIP on Floor. All speakers and host would be visible under VIP lounge.
Step 13: Private Session
Create the number of sessions applicable. Select the session one by one to add details similarly as in the step above.
Note: Session type will be Networking (Lounge) in this case
Step 14: VIP table
Create the number of speakers. Select the speaker to Add Speakers details.
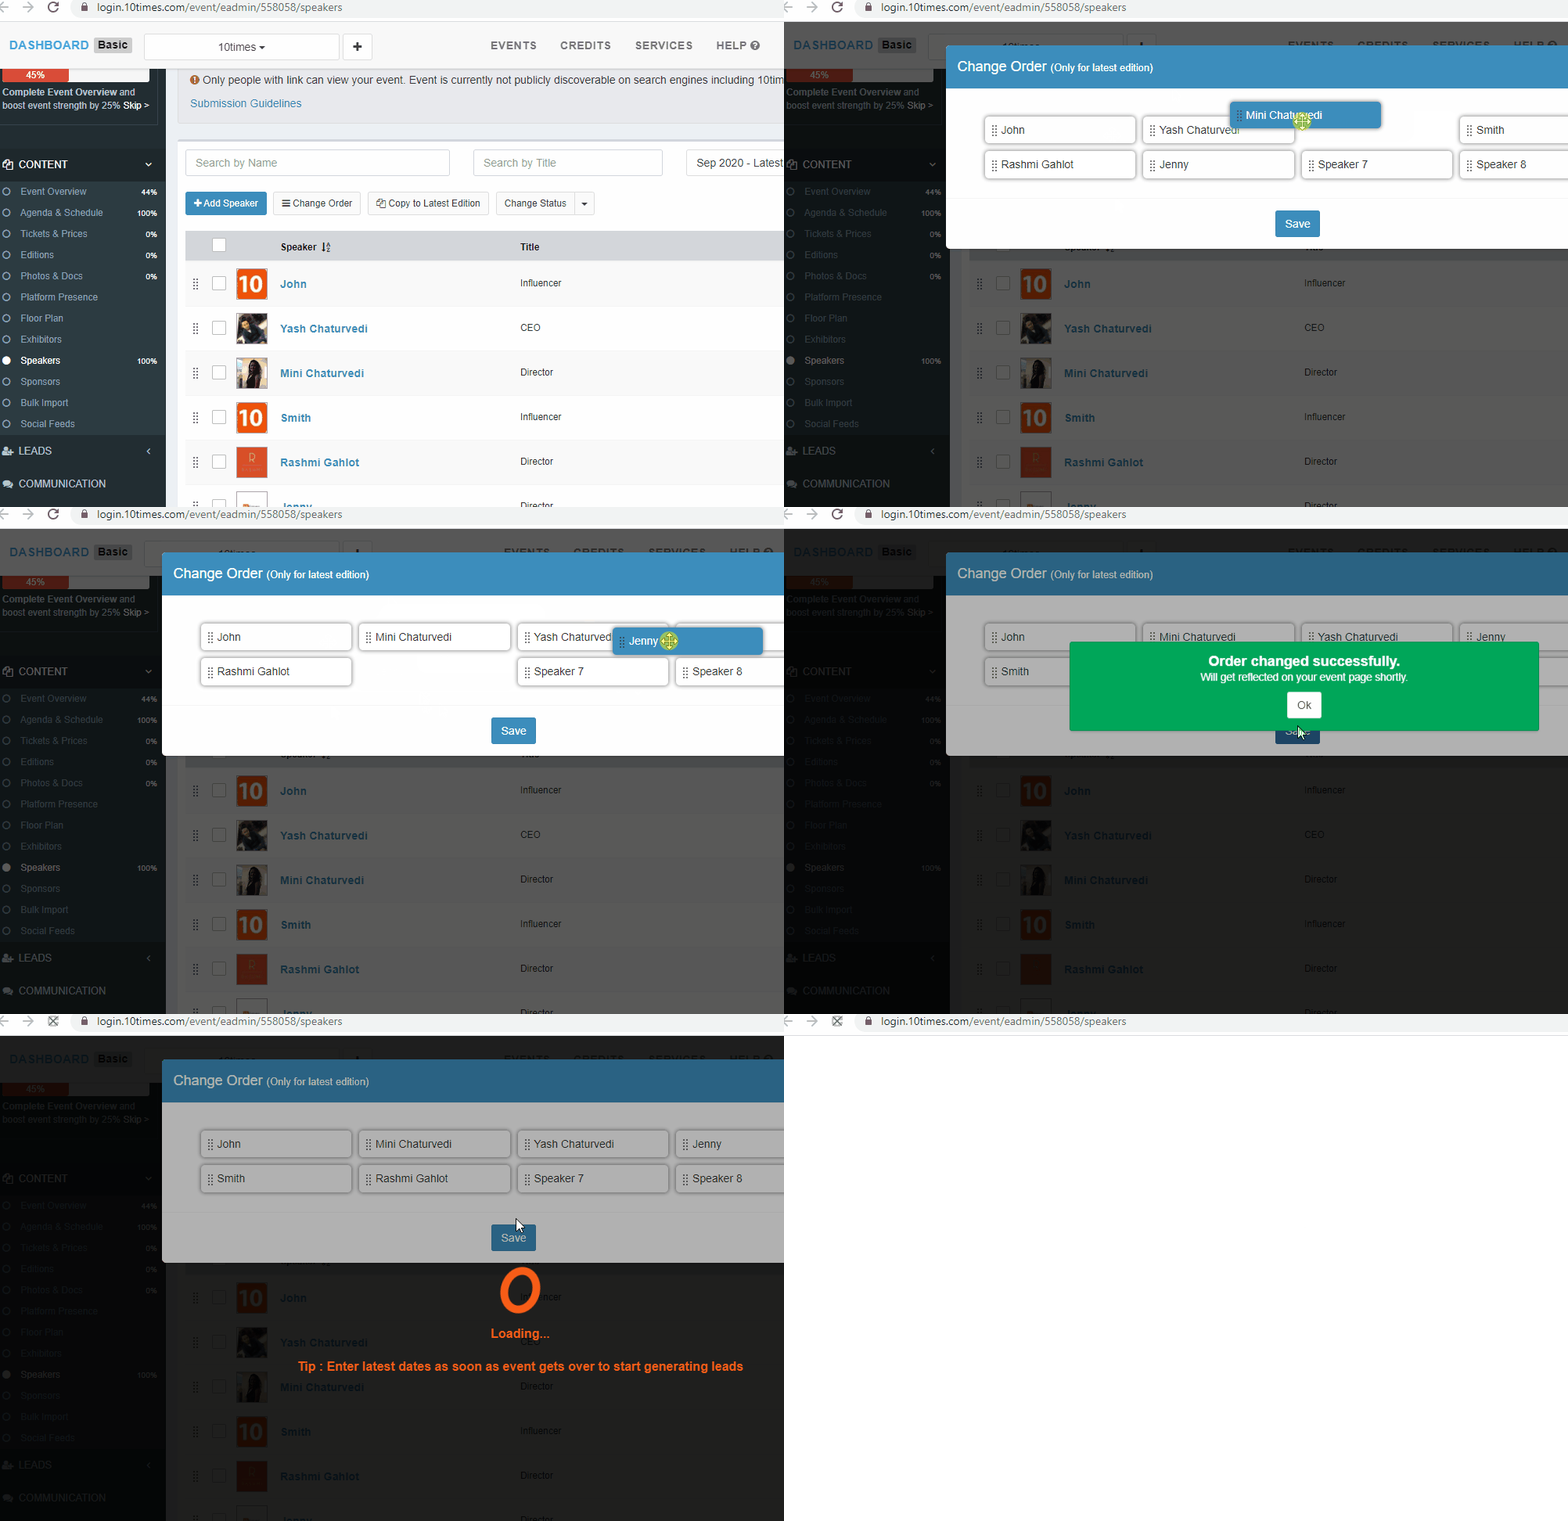
Note: You may also change the order of the speakers from dashboard, so as to display in that required sequence in your VIP lounge on FLOOR

Step 15: Booth
Create the number of booths and select them to Add Exhibitors details.
You can also create Premium Booth, if any, in your event.
Step 16: Add other pages under Content section (tickets & prices, platform presence, photos, Sponsors etc) to enrich your event strength and boost its visibility on 10times event page.
Please refer to How to add Online event from Dashboard
Note:
Ticketing and Sponsorship are paid features and you need to upgrade your account for the same.
The changes made on dashboard will in real time reflect on Floor.
Kindly refer to our event submission guidelines to submit and publish your event
Kindly click here to know how to publish your event, saved in drafts
Click here and learn about host functions and control settings
For further clarification, you may also refer to our respective video on YouTube
Was this article helpful?
That’s Great!
Thank you for your feedback
Sorry! We couldn't be helpful
Thank you for your feedback
Feedback sent
We appreciate your effort and will try to fix the article


