Launch your event website via dashboard
Dashboard is a complete event management suite for the event organizers. It is a one-stop solution, a techno-marketing tool created by 10times to help Event Organizers add and manage their event's life-cycle. It equips you with several marketing and technology features.
Launching your event website is one of those exclusive features.
You may create your event website by following the steps below:
Step 1: Select the event from your Dashboard for which you want to create the site.
Step 2: Go to Website Builder from left panel in your dashboard.

Step 3: You will see the below page. Click on Create Website

Step 4: DESIGN
You will land on the page below. Select the theme (Standard or FLOOR)
Select the background image (banner) by clicking on "Change". Else system would upload the default image.

You may choose image either from the gallery or can upload your own by clicking on "Upload your own", highlighted below
Click on "Save" to save the settings.

Note: It is recommended to upload an image that is at least 1520 x 512 pixels in JPG or PNG format
Step 5: CONTENT
You will land to the below page. You may disable the tabs irrelevant to your event for instance, we have disabled exhibitors and stall tabs below:

From Menu Settings, you may categorize fields as Main Menu or Sub-menu
"Edit Content" will redirect you to the respective Tab section wherein you may edit content and save data.
"Interactive Floor Plan" is our Premium feature. You can add dynamic Floor Plan for your event.
"Settings" of each tab allow you to modify Tab names if required.
"About" and "Terms" are mandatory fields. However, you may edit the content of "Terms" via its "Settings"
You may add more Tabs if required, under our Premium+ plan.
Once you have modified the Tabs and Content, Click on "Update Settings"

Step 6: HOMEPAGE
You may add carousels by clicking on the highlighted "+Add Carousel" below. Carousels are homepage banners, best used for marketing any content or display highlights of the event.

A form will pop up. Just fill in the required fields as below:

You may upload the background image of your choice, in the recommended size, via Choose > Upload your own > Save
You can add multiple carousels. Once you have added, click on "Update Settings"
This is how your carousel will look like:
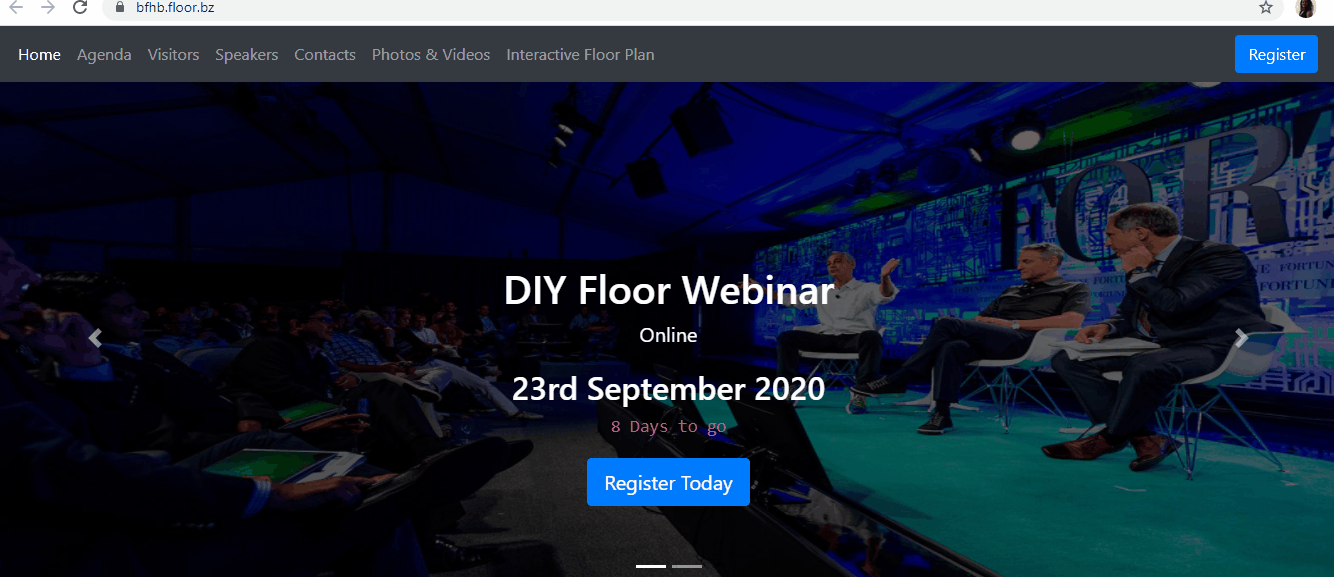
The "Register" tab is clickable and will redirect the user to URL entered in "Button Link" field.
Step 7: SETTINGS
By default, the site will be created on "Our Domain"
You may also launch your site on custom domain, which is our premium feature. Kindly click here to know how to launch your event website on your own domain.
Once you have selected the domain, Click on "Update Settings"
Note: You may anytime click on "Preview Website" tab to see how does your website look.

Watch this video below for further understanding:
Was this article helpful?
That’s Great!
Thank you for your feedback
Sorry! We couldn't be helpful
Thank you for your feedback
Feedback sent
We appreciate your effort and will try to fix the article