Contact interested leads via Mass mailers and download complete lead report
10times is open for all events discovery platforms and is being accessed by millions of event-goers, business professionals, working professionals, industry experts, students, teachers, doctors, and people from specific professions. All these people actively use the platform to find new events, research any events, share information and take part in discussions, etc.
In order to perform the above actions and be active on the platform they continue to engage with a platform at various call-to-action points for example: Follow, save, Interested, Going or Request a booth, etc. for any events, companies, page, or group of collections.
All such engagements are termed as "Leads" in the system and are also available for organizers, using a free organizer account.
Leads in the dashboard are received once the visitor has clicked on: the Interested, Going, or register.
As a Gold, Pro, and Platinum subscriber, you can access the contact details (Email ID & Ph. No.) of the leads and can send bulk emails to them in oDASH.
To manage and contact the leads, follow the below steps below:
Simply log in to your dashboard using your official email id and click on the Events tab.
Note: To log in to your account please make sure you have the access to your company profile or to your event(s). If you do not have access to your events know more about claiming your listings.
Once you would have access to your listings, go to your event dashboard by selecting the event for which your wish to access the information/leads from your my event dashboard.
SETTINGS
1. RSVP Settings
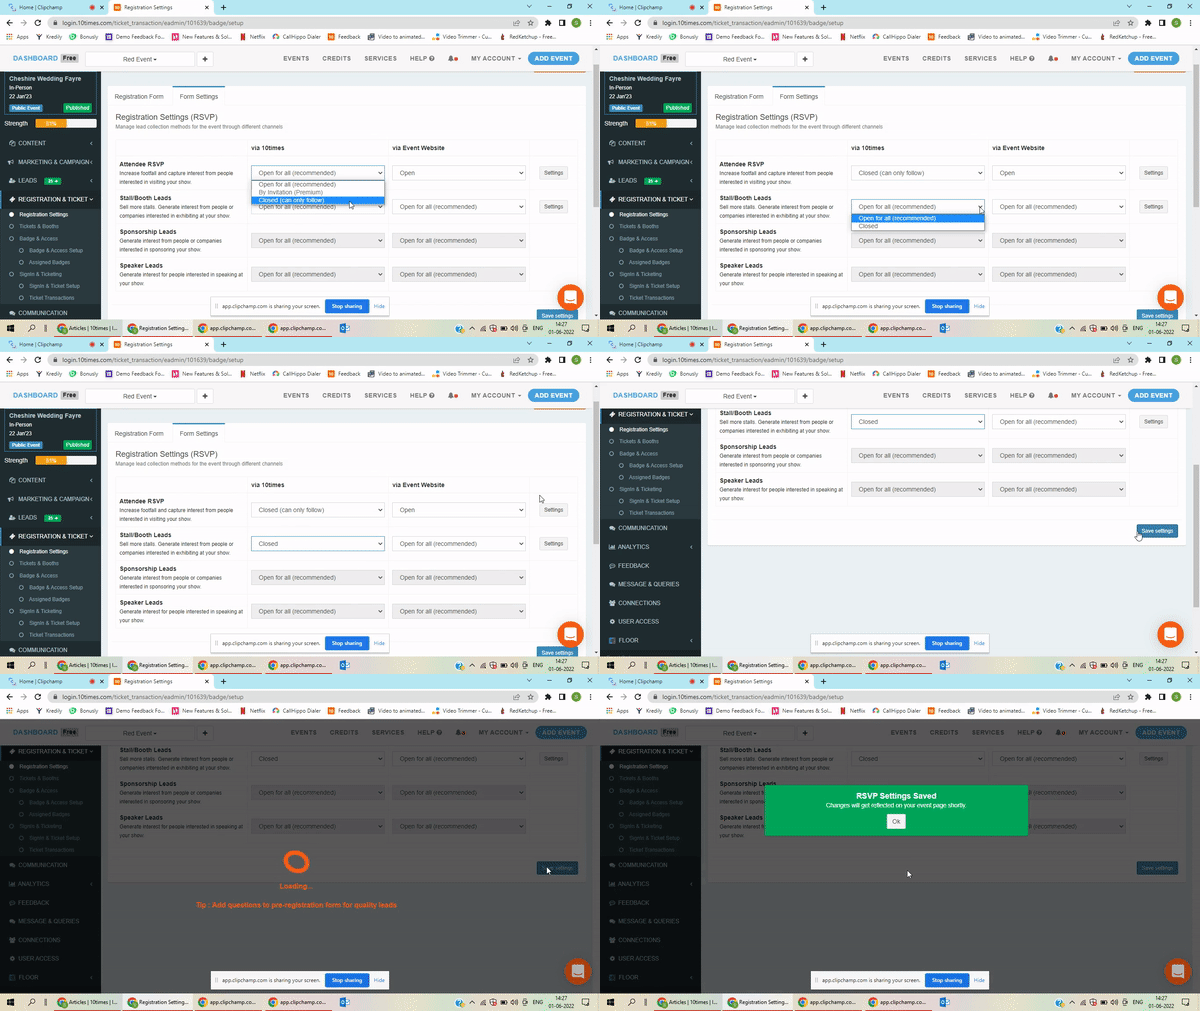
Select the desired Event > Go to Registration & Ticket from the left menu. (Refer to the image below)
Under Leads Settings, you can modify your RSVP settings.
So if you do not want any booth requests or any visitor interest in your events then you can mark them Closed. With this, the "Request a Booth" option will be disabled from your event page. and the "Interested" option will disappear. The only option that will show will be "Follow". so that users will not be able to show their interest but can only follow the events for information and updates.

2. RSVP Registration Form
You can customize RSVP registration form questions, for your users. A few of these questions are default and cannot be disabled. However, you may add Custom questions. So that you get to know about the potential leads showing interest in your event. There are two columns, one for the 10times event page and the other for users logging in our virtual platform.
MANAGE ALL LEADS
A page will open “Manage all leads” where you will be finding all the leads that have shown interest in your event. Their names, as well as their contact details, will be mentioned.
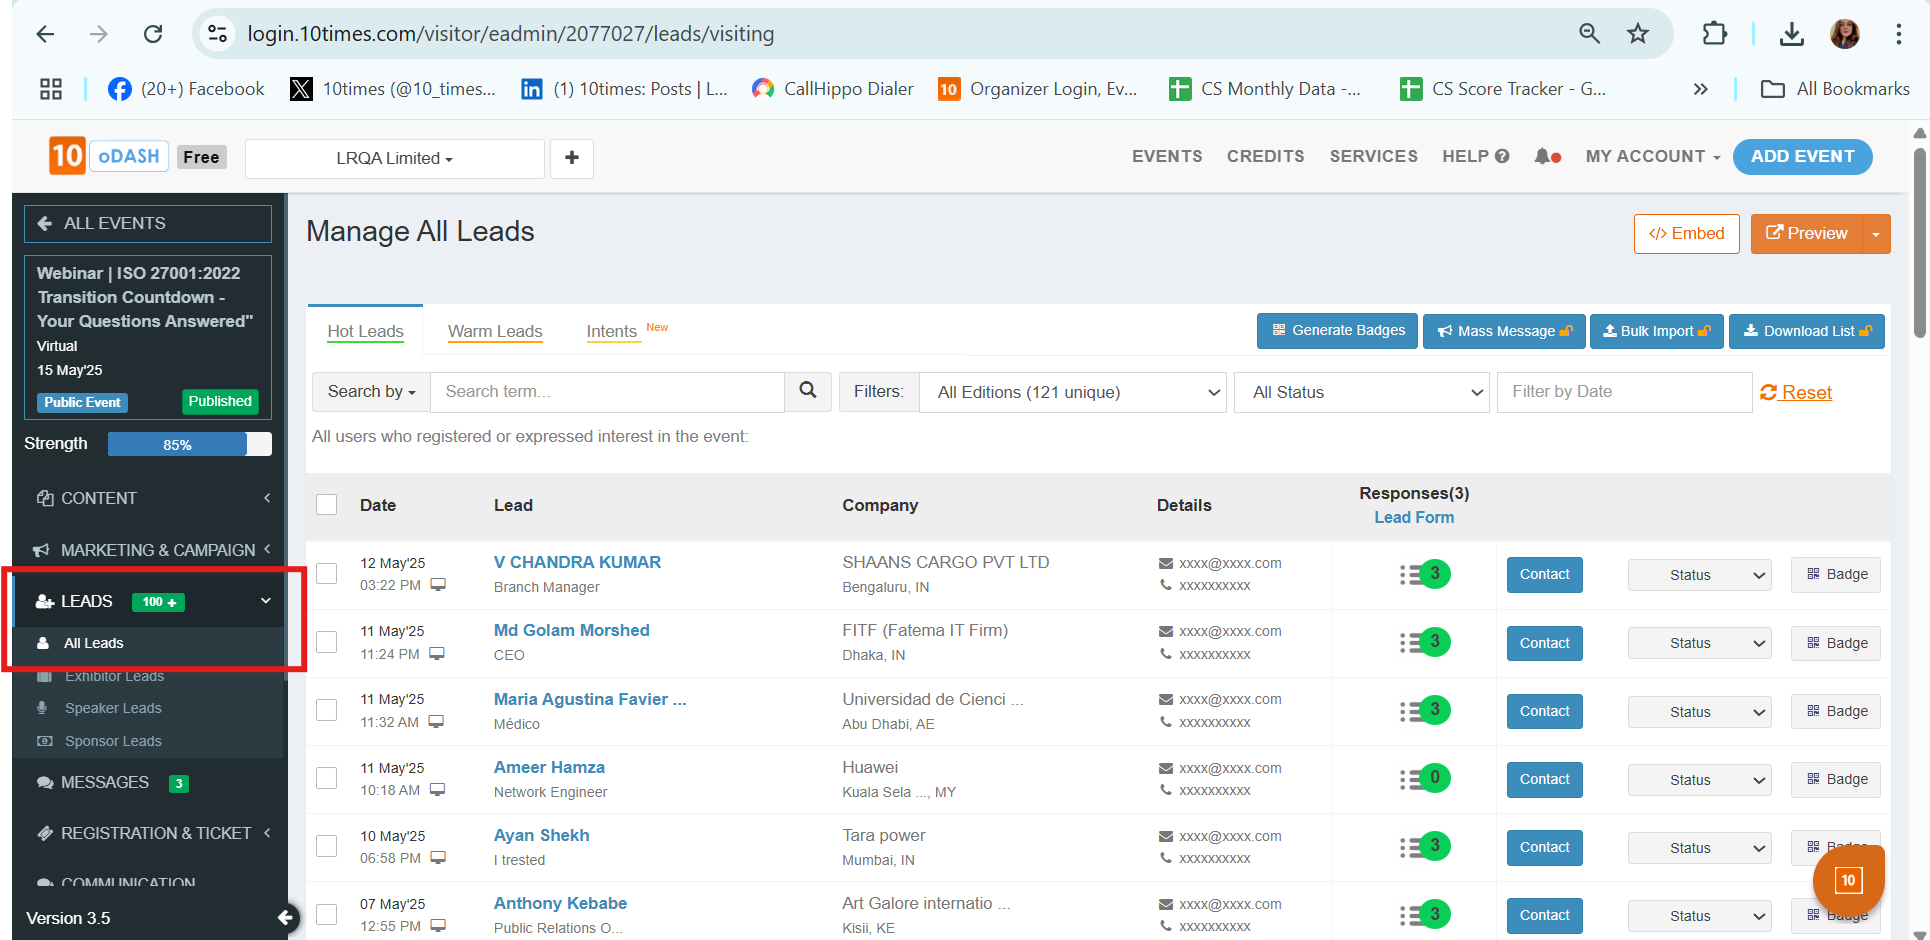
Step 1: On the left panel click on Leads, as shown in the below screenshot:

Here you can see the bifurcation of Leads as Hot, warm, and Prospect. See the below screenshot.

Hot Leads - Those people who have shown interest and answered the custom questions.
This shows that they are really eager to engage in this particular event. The chances of getting a positive response from them are high.
Warm Leads - People who have partially answered the custom questions. They are interested but not fully showed their intent regarding the event.
Intents - Potential audience who have landed on your event listing page and not registered yet. So these people are having high potential.
You can contact the prospect by sending them an email.
Note: To contact a prospect lead, two credits will be charged.
Contact: You can individually contact a lead via email. A pop will open to draft an email and will be sent from your Email ID registered with the dashboard.
Status: You can update the status once contact with lead. A drop-down will appear with options; No response, In talks, Confirmed, Spam, Not interested.
Print: You can print individual badges for a lead that will have its own unique ID. There are options to check-in, print, and update the badge.

Step 4: There are various Filter buttons on the same page through which you can filter leads on the basis of date, company, edition-wise, or through the status, they have mentioned per contact:

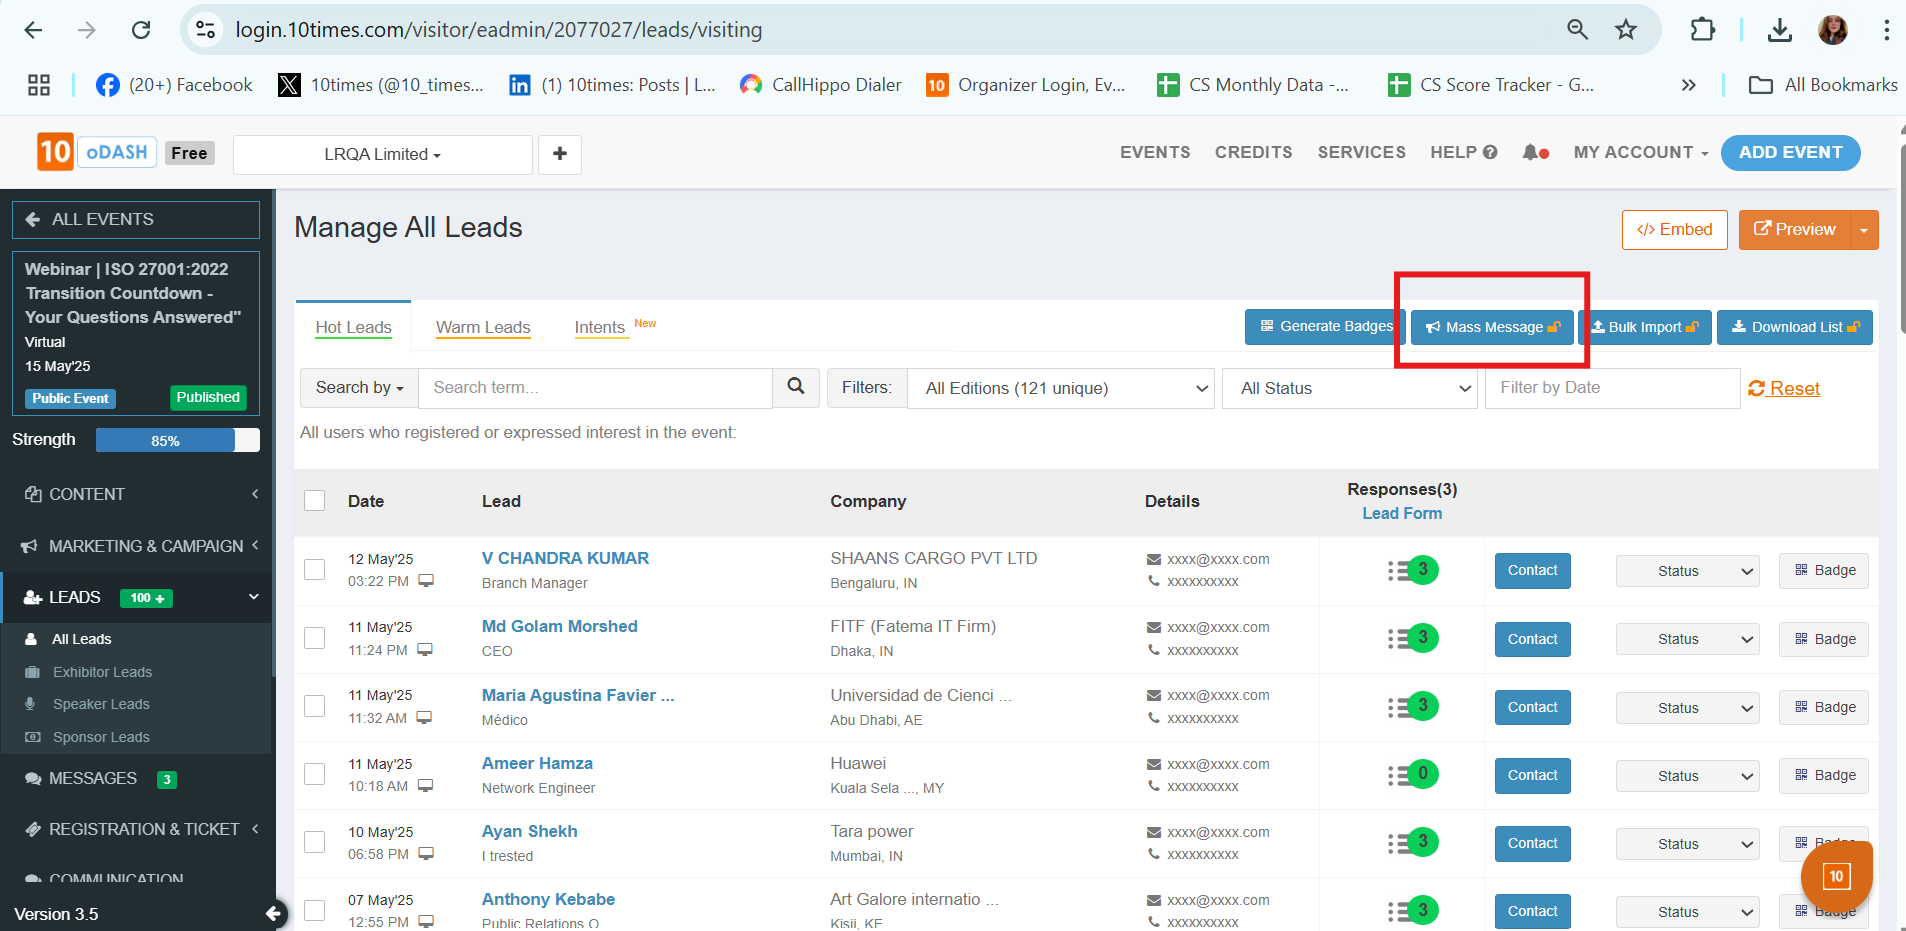
Step 5: There are some important Action buttons below the filters:
Mass Message: This is open for Gold, Pro, and Platinum customers in order to send mass mail to the selected leads. Once you select the leads you want to mail, you can click on this button and a pop-up will appear for drafting a common mail to all these leads which will be sent from your Email ID registered with the dashboard.
Download List: You can download the list of all the leads, names, companies, contact numbers, email IDs, & status and add them to your own excel or CRM.
Generate Badges: You can generate the badges for the selected leads. It will ask for options for the badges along with the color code. You can choose the title of the badge and follow the instructions to create it
Bulk Import - Through this feature, you can import your leads that are generated through other platforms and from here you can mass message them.
Important Note
Contact details of leads like phone, and email are visible and unlocked till 24 hours of capture, under free/basic plan. Post 24 hours, under the free plan, you may only contact through email, using the contact button given with each lead.
You can send personalized/ custom message to all the visitor/ exhibitor leads.
You can disable the button, not to receive any such leads (Visitor/ Speaker/ Stall Booking)
Under the marketing plans, you would be able to unlock the following features.
Full access to contact details even beyond 24 hours. Reply to your users from your mailbox and as per your convenience and increase your conversation rate.
Send mass messages or bulk messages. You don't need to send the same message one by one individually. The Mass message feature allows you to send the same message to your users in one go and saves time.
API Integrations. You have your own CRM no worries. Our API integration let you import all lead information right into your CRM. So that you have seamless integration with your existing workflows. Our APIs can be integrated with any CRM including Salesforce, Pipedrive, Zoho, etc. To know more, kindly refer to this article.
To know more on how to contact leads, send mass messages or download the list, please refer to the video below:
Was this article helpful?
That’s Great!
Thank you for your feedback
Sorry! We couldn't be helpful
Thank you for your feedback
Feedback sent
We appreciate your effort and will try to fix the article


